Course Editing
| Site: | Moodle at EMU |
| Course: | Moodle FAQs |
| Book: | Course Editing |
| Printed by: | Guest user |
| Date: | Wednesday, February 4, 2026, 4:49 AM |
Description
- Editing course settings
- Item edit tools
- Course visibility
- Gradebook visibility
- Blocks
- Importing content
- Resetting a course
1. Editing course settings
Before you can make any changes to a course, you must turn on Edit mode.
First click the toggle button on top right hand corner of your course page to enable Edit mode
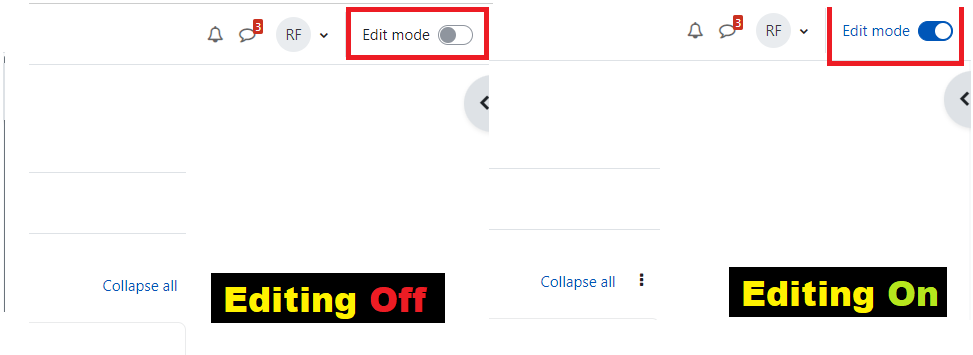
Once you turn editing on you will have many options below you will see a topic with editing on:
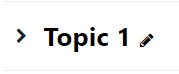
- Clicking and holding an item or topic will allow you to move that item within the course page and in the course index on the left
- Clicking the three dots and choosing "Edit settings" will let you edit the item or topic
- Clicking "Add an activity or resource" will give you a menu of activities to add to your course"
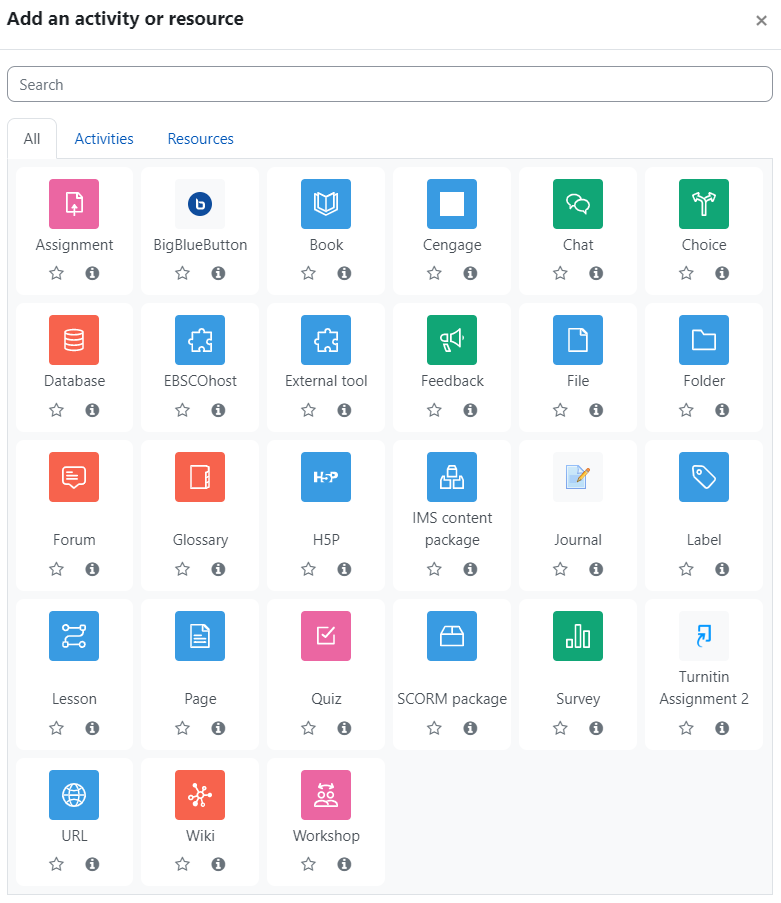 The activity chooser |
Alternatively, certain resources and activities may be added using drag and drop:
- To add a file, simply drag and drop it onto the course section where you'd like it to appear
- To add a folder of files, simply zip the folder then drag and drop it onto the course section where you'd like it to appear, answer 'Unzip files and create folder' to the popup dialogue, then click the upload button
You can view an example of typical edits made to a course below.
Some of this content is derived from https://docs.moodle.org/400/en/Course_homepage and available under GNU General Public License.
2. Item edit tools
With "Editing mode" turned on, you will see a number of available actions next to or near an item or topic.
 These three dots next to an item opens a dropdown of selectable actions such as Edit settings, Move, Hide, Duplicate, Assign roles, and Delete.
 - The settings icon opens up the settings page of an item where you can edit the attributes of an item such as the name, dates of availability, and point value.
 - The pencil icon allows the user to change the name of an item without going into the settings page. Type the new name in the field and press enter to apply or escape/click away to cancel.
 - The move icon allows the user to change where an item is located in a course.
 or
or  - The eye icon allows an editor to toggle hide or show on an item. If an item is hidden, students will be unable to see it in their view. Note: Other teachers, non-editing teachers, and non-grading teachers can still see these items when they are hidden.
 - The duplicate icon duplicates an item on the course page.
 - The assign roles icon allows the user to assign roles locally to an item. For example: a student could be granted the role of Teacher for a specific assignment.
 - The trashcan icon allows the user to delete an item.
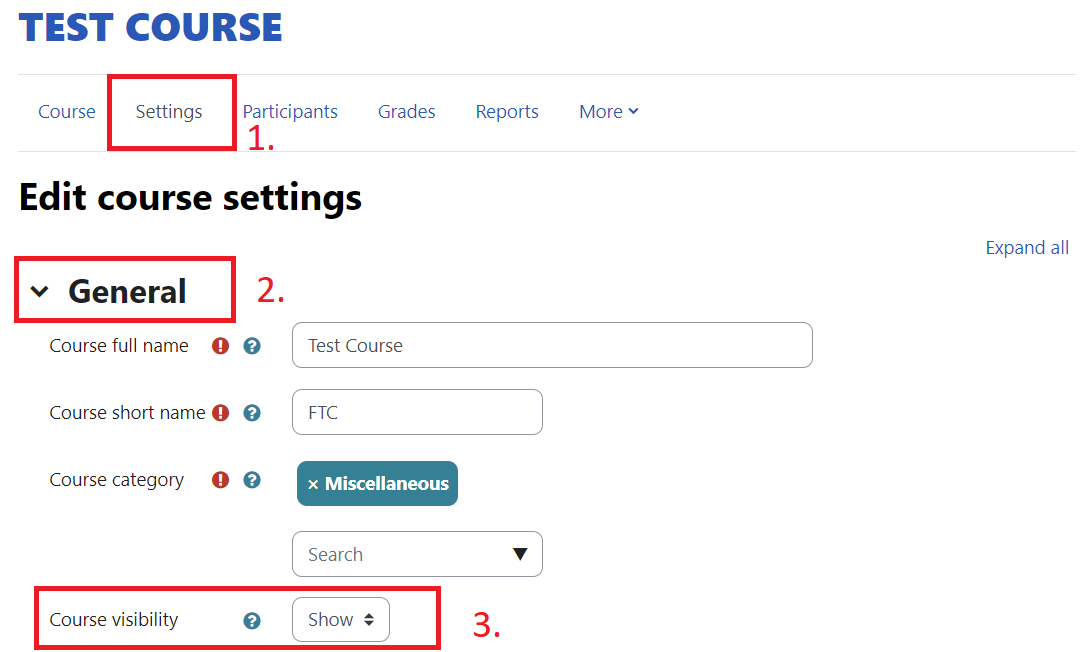
3. Course visibility
Courses can be hidden from students at any point before or during the semester. This setting is located in the course settings. When visible, students will be able to access the course.
Navigate to the "Settings" tab on your secondary navigation bar and find the "General" section. There you will see a setting "Course visibility" which you can toggle to show or hide from a dropdown. Click "Save and display" at the bottom of the page to apply settings.
4. Gradebook visibility
Gradebooks can be hidden from students at any point before or during a course. This setting is located in the course settings. When visible, students will be able to see their own grades and upcoming assignments. Hidden items will not be shown in their view.
Navigate to the "Settings" tab on your secondary navigation bar and find the appearance section. There you will see a setting "Show gradebook to students" which you can toggle on and off from a dropdown. Click "Save and display" at the bottom of the page to apply settings.

Click here for more Moodle Documentation about Moodle Gradebook
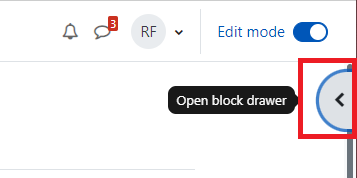
5. Blocks
Blocks are content containers that can be added to the right side of the a Moodle course. Popular ones include Panopto and Quickmail.To add a block to your course, turn on edit mode and click the arrow on the grey tab on the upper right-hand side of the screen to open the block drawer.
Click "Add a block"
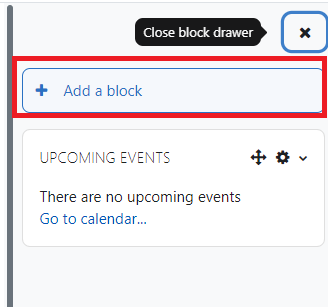
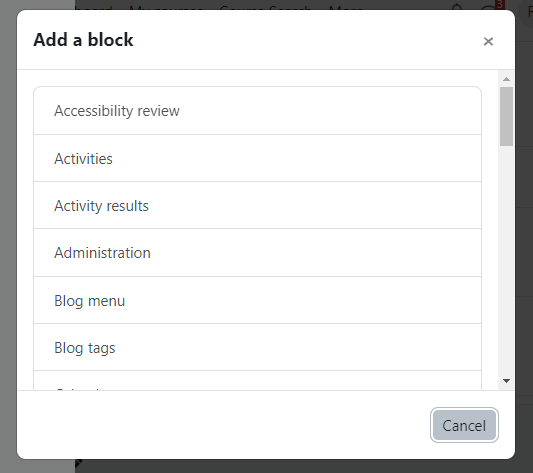
This will open a popup with a list of available blocks. Select the one you want and it will appear in the block drawer. Click the x to close the block drawer.
Click here for more Moodle Documentation about Blocks.
6. Import content
Note: you must be listed as a teacher with editing rights on the course you wish to import from. If you are not, please contact the Helpdesk for access to this course.
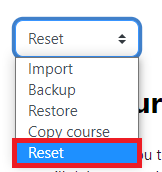
Click "More" in the secondary header and select "Course reuse" in the dropdown.

There will be a list of courses to choose from, but most likely you will need to search for the course you wish to use. The most effective search uses the descriptive name of the course.
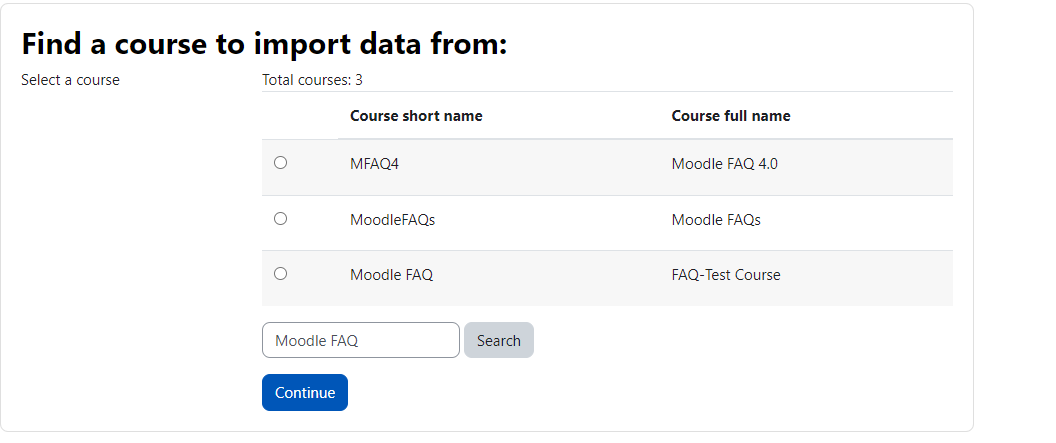
If the course is not in the list of results: Check your spelling, use a broader or narrower search description, or ensure you are listed as a “Teacher” for the course you are looking for.
When you have found the course you are looking for select it and click continue.
Uncheck everything but the category of the item you want to import (usually activities and resources) and select “Next," then "Perform import"

If Import completed successfully you will receive message “Import complete. Click continue to return to course.” Click continue and all content should be imported.
If you receive an error message please take note of the message, then check the course content. If content was not imported contact the help desk with the error message you received.
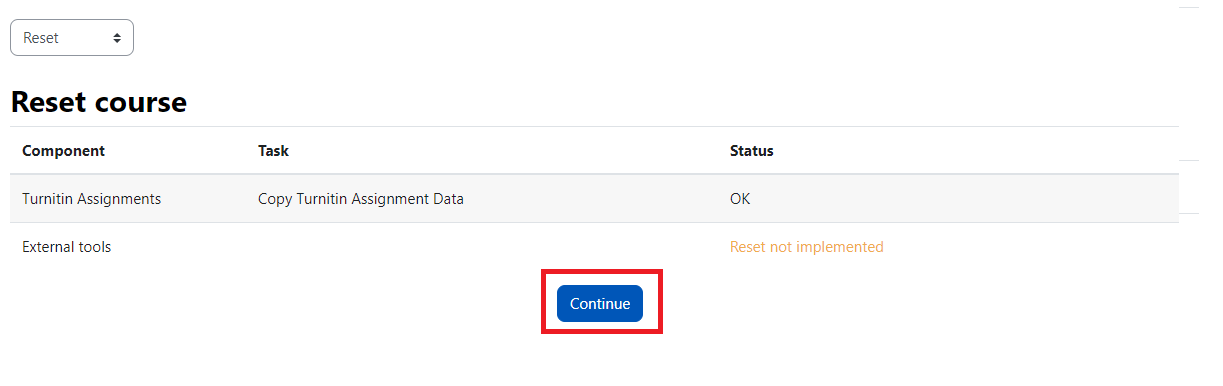
7. Resetting a course
Resetting a course will clear user data from all assignments. This must be performed to reset user data for TurnItIn assignments that have been imported from previous courses. This clears to old user data and allows the new students in the course access to the assignment. Resetting can also help you reset the course dates.
Click "More" in the secondary header and select "Course reuse" in the dropdown.

In the general section check that the course match your courses dates.
Scroll down the page to the "TurnItIn" section.
Ensure the "Select Option" box reads "Copy TurnItIn Assignment (Create Duplicates, New Trunitin Class)"
Check box next to "Use new assignment dates" Note: you will need to double check the assignment dates within the assignment settings.
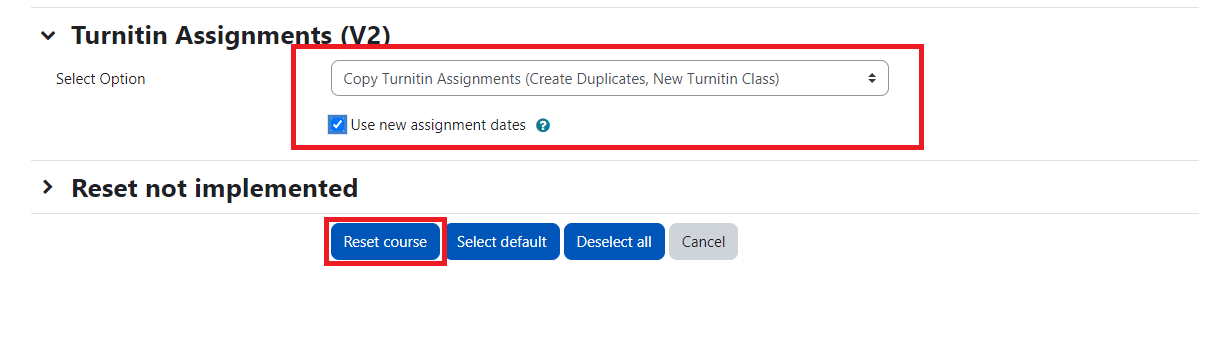
On the next page, click "Continue" to complete the reset.