Setting up and Adding Grades
| Site: | Moodle at EMU |
| Course: | Moodle FAQs |
| Book: | Setting up and Adding Grades |
| Printed by: | Guest user |
| Date: | Wednesday, December 24, 2025, 10:36 PM |
Description
- Accessing the Gradebook
- Aggregation
- Grade Categories
- Add manually graded item from outside Moodle
- Grading
1. Gradebook Overview
Gradebook
Most grade entry in Moodle occurs through the assignments tools. The Moodle gradebook only shows grades for assignments you've already created within your course. Assignment tools also allow you to enter grades and provide student feedback more efficiently than the gradebook. You will generally use the gradebook only to review grades and assignments, change assignment weightings, or make other changes that affect all assignments and grades.Accessing the Gradebook
On the course landing page, click "Grades" in the secondary navigation bar.
Here you will find a dropdown allowing you to select different views.
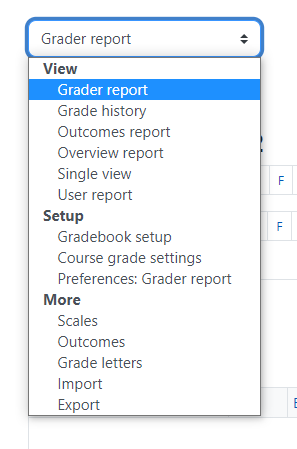
View
- Grader report - Gives you access to all students grades for all assignments. Students will be listed down the left column and the assignments across the top. Each of these Students and Assignments will remain locked as you scroll across or down the gradebook so they will always remain visible. Clicking on an assignment will take you to the assignment page. You can manually add grades here by clicking on the individual grid or cell.
- Grade history - Allows you to search students grades history
- Outcomes report - used if you set up outcome benchmarks for your course
- Single View - Allows you to see grades and feedback for all students on one graded assignment
- User Report - Allows you to see a detailed grade report on all assignments for each student.
- Gradebook setup - Use this menu to set-up course grading aggregations, Categories, manually graded assignments, and outcomes. You will use this menu to set up how the gradebook handles individual grades, the grade calculations and how the gradebook is organized.
- Course grade settings - Can use this to modify how students see gradebook
- Preferences: Grader report - Modify how grader reports are seen
More:
- Scales - Use this menu to modify or add grading scales like Pass/Fail or Check/Uncheck
- Outcomes - Use this menu to create outcomes to use for benchmarks or to show proficiencies.
- Letters - View or modify letter grade's numeric grade scale.
- Import - Used for importing grades from a spreadsheet.
- Export - Used to export grades to a spreadsheet.
2. Aggregation
There are many ways to set up your gradebook and there are many aggregation settings for how grades are averaged. For the example below we will show how to setup grade categories such as; assignments, quizzes, forums, essays or you can use categories to set-up by week with a "Natural" aggregation. There are also many aggregations. The most common is "Natural" where the total points earned is divided by the total point, however mean of grades and weighted mean of grades are also valid aggregations styles, but there may be times you need to look at another grade calculation style. If you need help figuring out gradebook setup or want to try setup not covered by this tutorial please contact the helpdesk.
Aggregation types:
Gradebook aggregation allows you to choose how your grades are calculated. Natural is the most common style where the total number of earned points is divided by the total points and multiplied by 100 to give you a percentage value. However there are several other aggregation styles that you can use to calculated your grades. Most courses will use one of the first 3, but there will be times when you may want a sub category of assignments to calculate in a different manor. Please review to the following material.
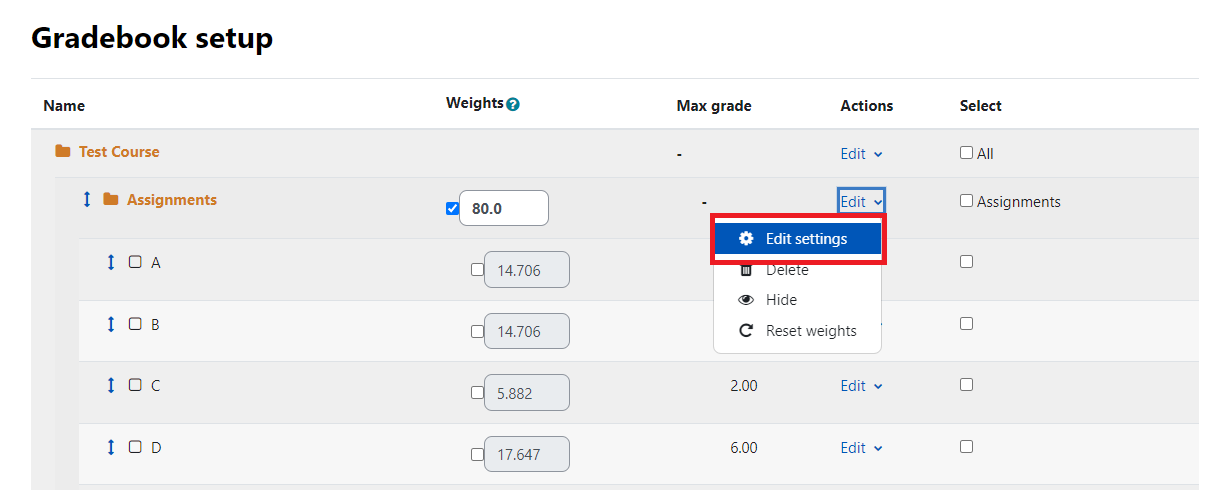
The very top item listed in the Gradebook should be a title heading named for your course. Click on the "Edit" link across from that then click "Edit Setting"
Use the drop down menu for aggregation to select your preferred aggregations style. A complete description of each style is listed below. The default option is "Natural"
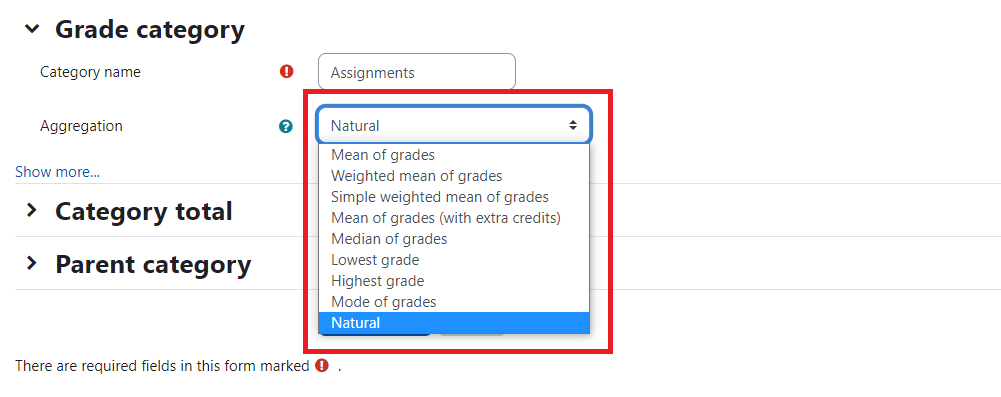
Natural: The total student earned points divided by the total possible points. Extra Credit is possible in which case the student points earned for that assignment will count but the total possible points for that assignment will not be added to the total for the course. Natural aggregation is the default setting for gradebook.
Example the student earns 4 out of 5 points for the 1st assignment, 5 out of 5 for the 2nd, 17 out of 20 for the 3rd and 22 out of 25 for the 4th. The student final grade would be taken by adding the total points earned 4 + 5 + 17 + 22 = 48 and dividing by the total possible points 5 + 5 + 20 + 25 = 55 so 48/55=87.27%
Mean of Grades: the sum of all the grades on a 0-100% scaled divided by the total number of grades. All grades are out of 100 and are weighted the same.
Weighted Mean of Grades: Each grade on 0-100% scale can be given a weight to influence its influence on the overall average or "mean" of grades.
Example: a student earns a 90% on their 1st assignment, a 70% on their 2nd, an 85% on the 3rd, and an 89% on the 4th.
In a mean of grades the final score for this student would be (90 + 70 + 85 + 89)/4 or 334/4 = 83.5%
For a Weighted Mean let's say the 2nd and 4th assignments are weighted twice the other two assignments. for this example the students grade would be (90 + 70 + 70 + 85 + 89 + 89)/6 or 493/6 = 82.167%
Simple Weighted Mean of Grades: Similar to Natural in that grades are weighted by giving them various total possible points, but each grade is averaged then multiplied by it's total number of points to give it weight, these are added together and divided by the total possible points for the course
Using the example from Natural above where the student earns 4 out of 5 points for the 1st assignment, 5 out of 5 for the 2nd, 17 out of 20 for the 3rd and 22 out of 25 for the 4th. The student final grade would be calculated by getting the average of each grade multiplied by it's possible points (4/5 * 5) + (5/5 * 5) + (17/20 * 20) + (22/25 * 25) = 4 + 5 17 +22 = 48 the total of possible points is 5 + 5 + 20 + 25 = 55 the grade would be 48/55 = 87.27. For all intents and purposes this example results in a grade that is exactly as Natural. The difference is that Simple weighted allows you to weight a single grade. so for example assignment 2 is weighed twice the rest of the assignments now the grade would be (4/5 * 5) + (5/5 * (5*2)) + (17/20 * 20) + (22/25 * 25)/(5 + (5 * 2) + 20 + 25) = (4 + 10 + 17 + 22)/(4 +10 + 20 +25) = 53/60 = 88.33%. Note this same result could be accomplished in natural just by making assignment 2 worth 10 in the first place, but this allows you to retroactively give more weigh to certain assignments.
Less Common Aggregation types: These aggregation styles may not find use for an entire courses aggregation, but could be useful for a sub category of assignments within the course.
Median of grades: Final grade is the middle grade (or mean of 2 middle grades if total number of grades is an even amount.) This aggregation style would be used to exclude outliers.
Smallest Grade: The result is the smallest of grades.
Highest Grade: The result is the highest grade.
Mode of Grades: This would result in the grade that occurs most frequently
Mean of Grades (With extra credit): This is a legacy aggregation that is only included for older courses that were originally set up this way, the style aggregation can be accomplished using the Weighted Mean of Grades defined above.
Click here to visit Moodle's official documentation on this topic.3. Grade Categories
Although in a Natural aggregation adding categories does not affect the total grade, it can help organize your gradebook and make it easier for students to view grades in a format that matches your syllabus. As long as your aggregation is Natural you can also set up categories for each week or topic.
Grade Category Setup
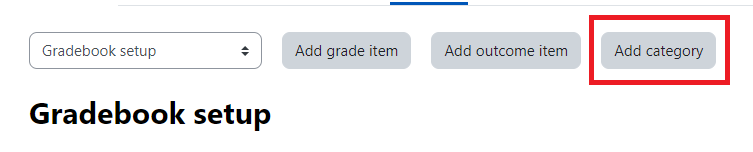
While in the Gradebook Setup click "Add category" at the top of the page.
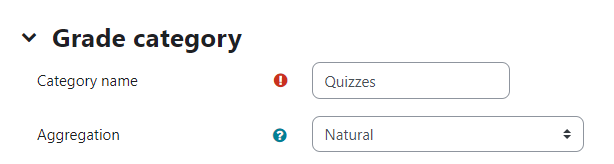
Give your Category a name (i.e. Quizzes, Term Paper, Assignments, Forums). For this example we will keep the aggregation as Natural but this does not necessarily have to match the category for the entire gradebook, for more detail on aggregation see the above discussion.
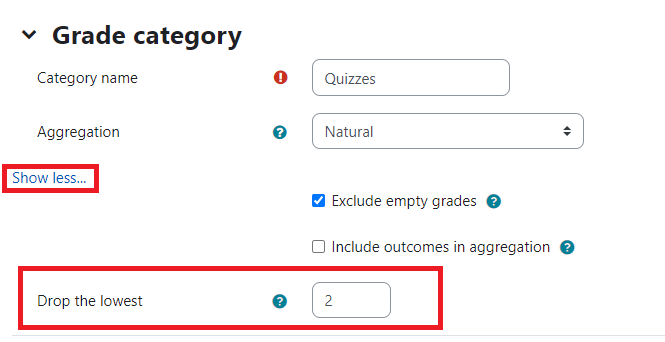
Note if you are dropping the lowest x number of grades for this category click on "Show more." In the box for "Drop Lowest" add the number of grades you will not count. This will default to 0.
Note on additional Category menu options: The Category Total will only be used if you change the aggregation from Natural. If you keep the Natural aggregation the category total will be equal to the total point value for all the graded items placed in that category.
The Parent Category Will only be used if you are creating sub-sub categories.
Moving Existing Gradebook Items into Categories
Once you have created your categories you will want to move the items already in your gradebook into these categories. Any new graded items can be added directly from that items settings page, we will cover that below.
In the far right column you will see a column heading "Select." Select the items you want to move into a category by checking the box under select across from its name.
Scroll to the bottom of the graded items list and select your category for the drop down menu "Move selected items to" 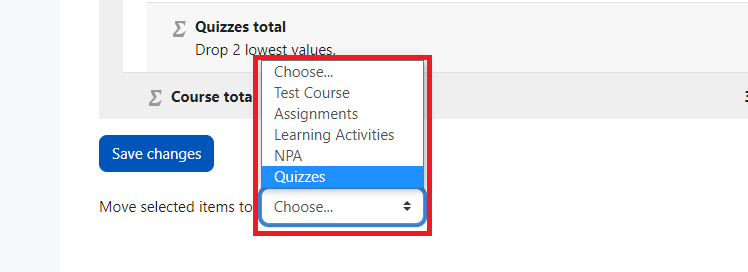
Select "Continue" or "Leave" in the popup.
Adding a New Activity Directly to a Gradebook Category
Once you have added a new graded item (assignment, Turnitin, quiz, forum...) on the settings page scroll down to "Grade" and expand that menu item by clicking on it. In the "Grade category" drop down menu choose the category you want to add that item to. 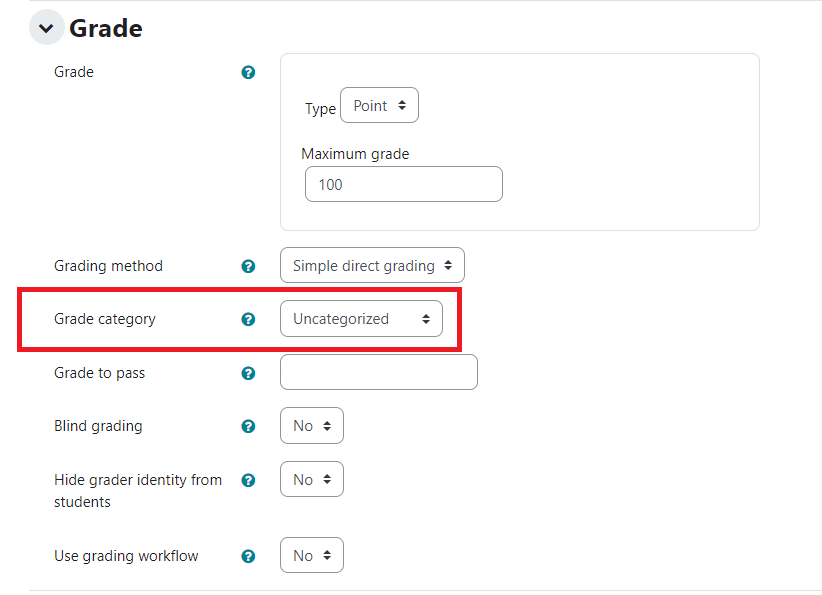
When finished editing the activity, click "Save" at the bottom of the screen.
4. Adding Grade Items
If you need to enter a grade into gradebook for an assignment that is not submitted through Moodle or for something intangible like participation, you can create a manually graded item. This activity will not show up on the course page, but will appear within the Grader Report.
While in the Gradebook Setup click "Add grade item" at the top of the page.
Give the Item a name. Put the point value for the assignment in "Maximum grade" and if you are using gradebook categories select the category from the dropdown menu.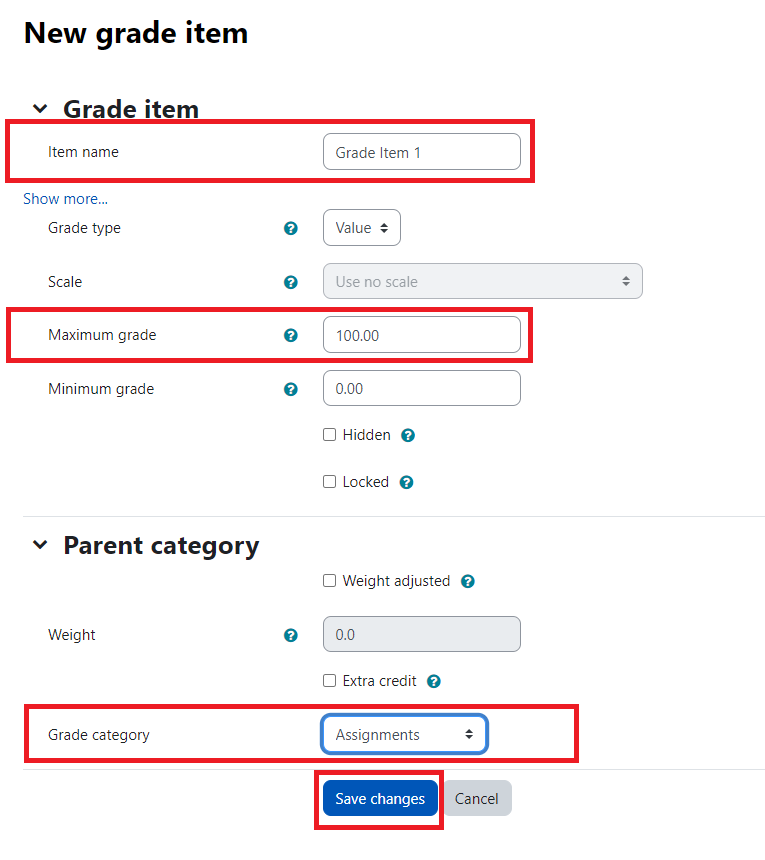
When you are done click on "Save Changes"
5. Grading
Grading is typically performed on the assignment level from the grading summary page, however, it is possible to grant overwrite grades from the Grader Report. If you plan to grade assignments using the overwrite method, know that grades made on the assignment level will no longer apply for submissions with overwritten grades.
Grading on the Assignment Level
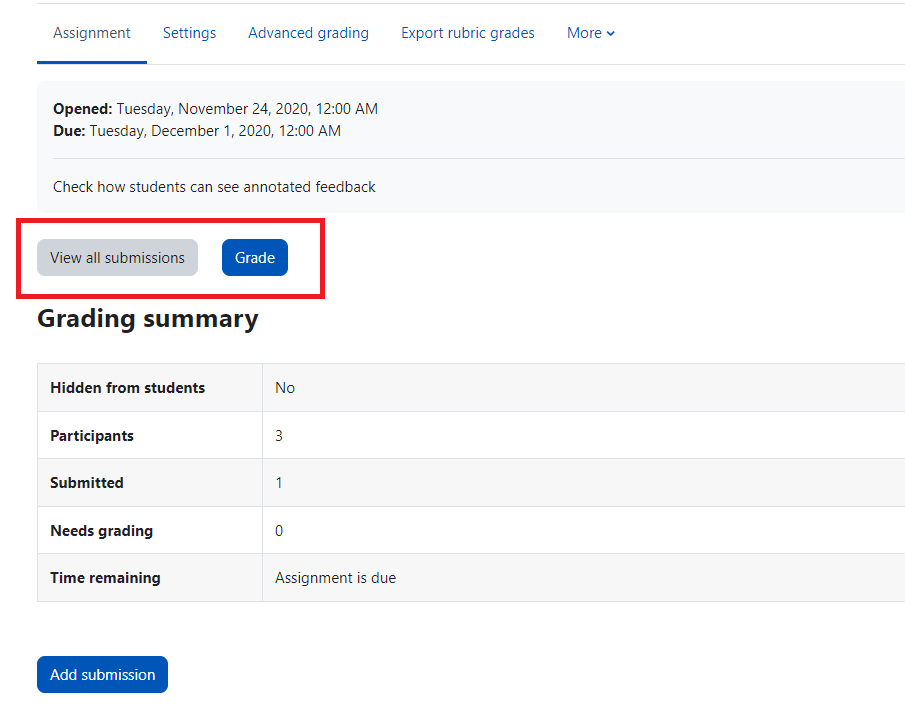
You can click on the assignment from the course page or you can click on the assignment in the Grader report page in Gradebook. Scroll across the graded items till you find the item you want to grade and click on the assignment name. This takes you to a Grading summary page.
This page will tell you how many participants, how many have submitted and how many need to be graded. When you are ready to grade the assignments clicking "Grade" will take you through each users 1 by 1 however "view all submissions" will allow you to choose the assignments to grade.
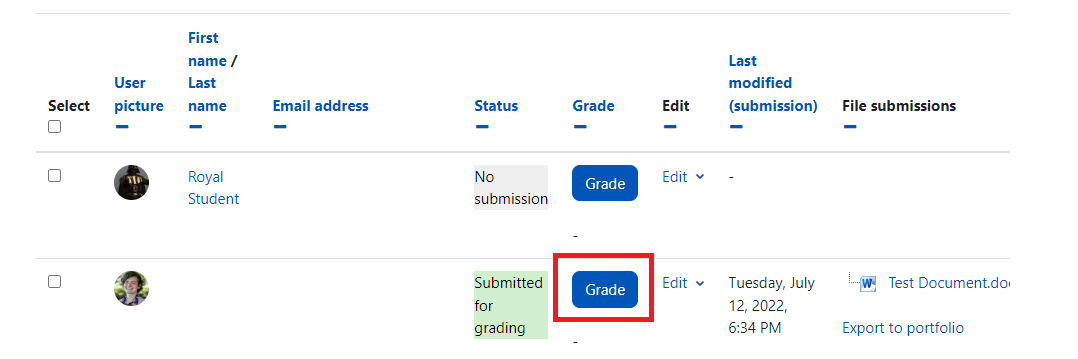
From this page you can see all student who have submissions, download submitted documents, enter feedback comments, and record grades. You can perform all of this from this page, but we will look at the individual student view. Note under "Status" this should read "Submitted for Grading, " however if a student uploads a document but neglects to click on submit, this can read "Draft"
To view the individual grading area click on "Grade"
This will open the PDF annotator where a PDF of the student's submission will be generated onto which you can annotate with highlights, comments, and drawings using the toolbar at the top of the page. Feedback comments can be added as well on the right hand side.
Under "Grade" on the right-hand side is a box to put a grade out of however many points were assigned to the assignment during setup. This grade will appear in the Grader Report.
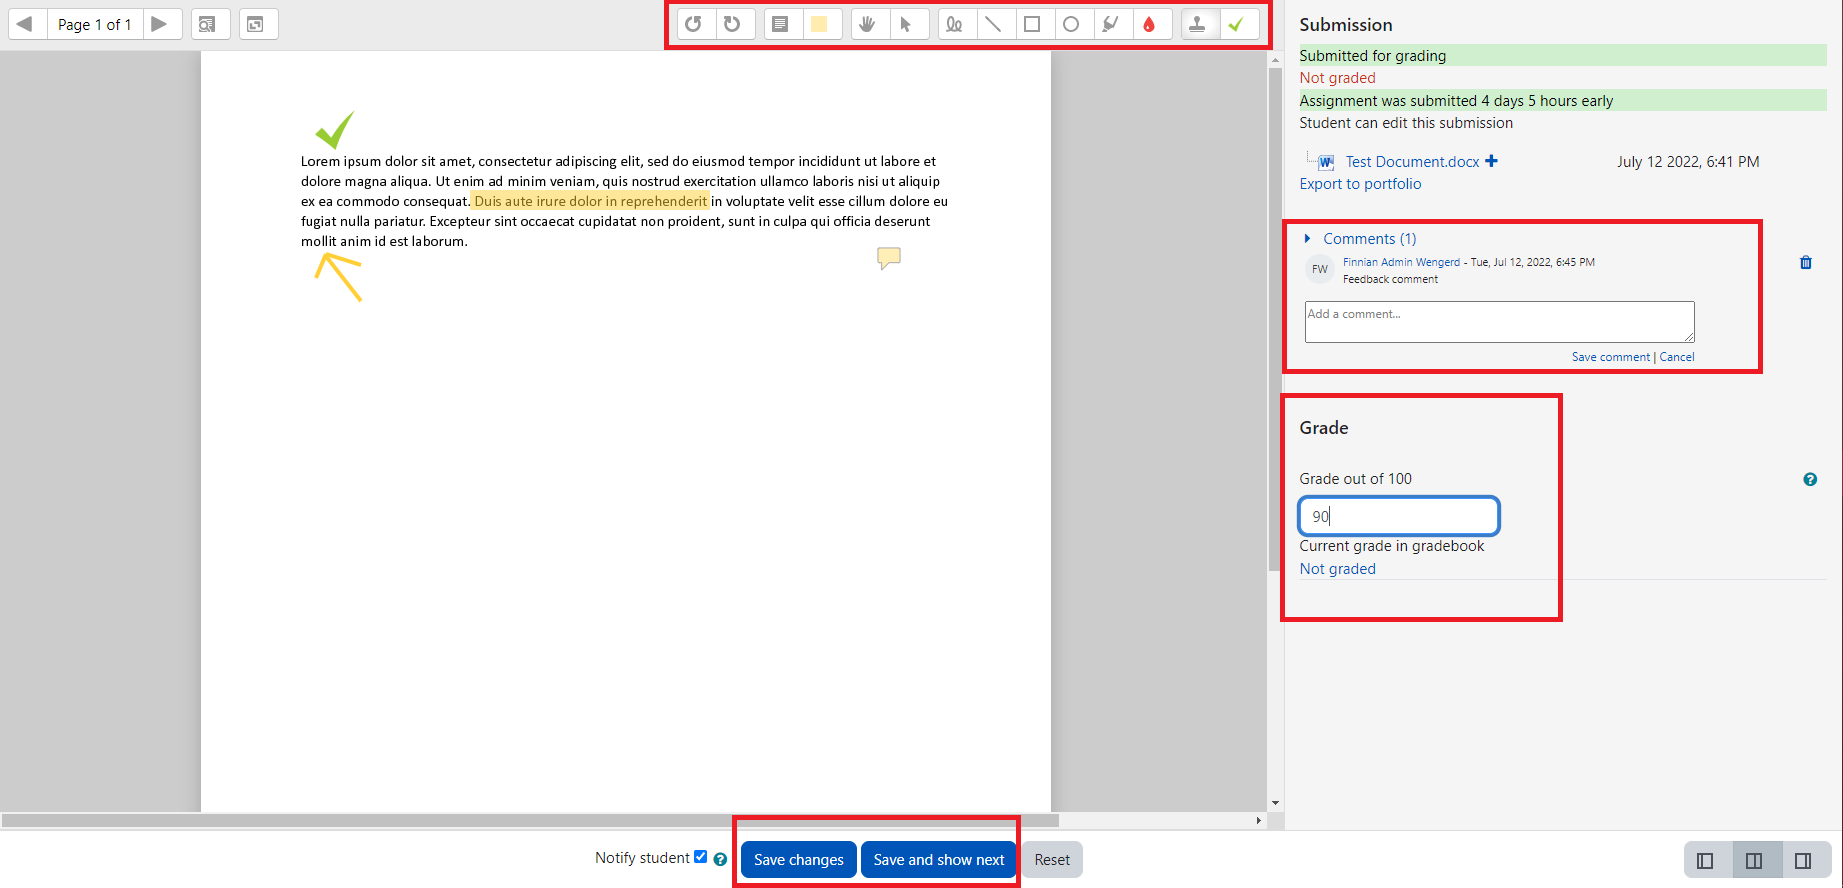
When done annotating, click "Save changes" to go back or "Save and show next" to go to the next submission.
Overwriting Grades
If you have an assignment that is submitted outside of Moodle and you entered a graded item for it in gradebook, or if you want to override a graded item you can do this from gradebook. From the Grader Report, scroll to the Assignment you want to manually grade. Click on the cell for the student, enter the grade, and press the enter key. The cell with the overwrite grade will turn yellow.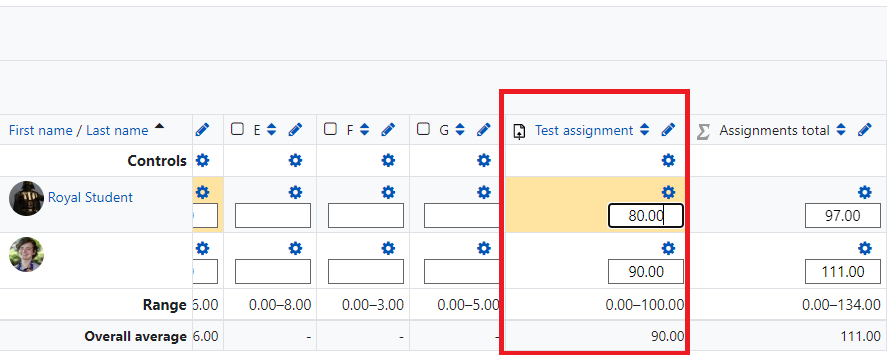
Be careful! Putting an overwrite grade in a "total" column will overwrite all grades in the category.
To remove an overwrite grade, click on the pencil icon next to the column title.

Uncheck the box next to the overwrite grade you wish to remove and click "Save"
